This is Skylar's room.
We moved all her stuff, bed, dresser, and boxed up her belongings. The plan is to paint her room.
Skylar's closet
But, there is always a but.
But she has a popcorn ceiling. All of the ceilings in our home have it. We don't like it. So it needs to come down.
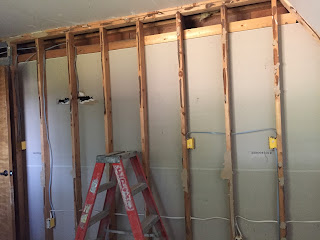
We used a thermal imaging camera to show us where the heat loss is. We decided to remove the sheet rock from the outside walls. This is so we can re-insulate. Tim and Skylar are removing the trim.
We aren't fond of the mudding job done on this wall.
Sheet rock removed on outside wall and part of ceiling.
Second outside wall done.
We decided to go ahead and take down the ceiling too.
Whoever hung the sheetrock glued it on every stud. We will need to scrape the old glue off and remove the nails. The next thing will be to remove the insulation.
Tim and Skylar did remove the carpet and pad.
Tim worked on removing all the insulation.
We didn't find anything wrong with the insulation. So we are keeping it and will put it back in. However we will be spray foaming and putting in foam board before adding the insulation back in. We did find a few spots that didn't have insulation.
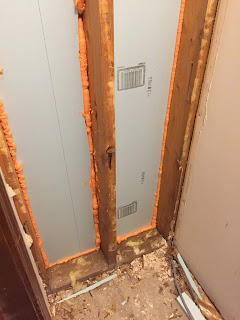
Tim spray foamed any gaps, holes or anything that might cause a draft.
This is the ceiling part and you can't see it but I can see outside right there.
See the wood area I am pointing out all the way down the board - No insulation. That isn't good. It's the corner of the outside wall.
Not to mention all the mud-dobber nest we found.
Definitely they had plenty of holes to come in.
See the blue foam board? There was no insulation there.
We will be buying more to cover the areas that didn't have any.
Tim worked on removing the upper insulation to get it spray foamed and the foam board in.
This stuff hanging was just in the way.
So, Tim screwed a board up to hold it back while he was working.
Good thinking!
He got that part done.
We still need to work on the closet outside wall.
But, the bedroom isn't ready for sheet rock yet.
This is the ceiling and the white electrical wire is the wall to our room. We want to put in sound barrier insulation between the floors.
This will help to make our room quieter and warmer in the winter.
We will put it in the ceiling area of her room which is our floor to our room.
I picked up some really good sound-proof and fire proof insulation.
Almost got it all up.
Tim is putting in the last row.
Putting the sheet rock through the window.
It's just easier.
See the wall behind the girls?
We decided to remove the sheet rock and put in the sound-proofing/fire proof insulation.
Skylar and Tim worked on getting the ceiling sheet rocked.
They got that part done.
Tim worked on getting the rest of the lower ceiling and wall done.
Tim and I decided it would be a good idea to put in some insulation/fireproof on this wall. On the other side of this wall is the kitchen.
Tim got all the sheetrock on the walls.
The next step - Taping and Mudding.
Skylar and Tim got the first of several coats of mud and tape up on the walls and ceiling.
Next will be the messy part - Sanding all of this.
But first, the closet. The closet outside wall still needs the sheetrock removed so new insulation can be put in. Tim gave this job to Skylar.
Skylar is removing the shelving in the closet.
Some of this like the electricial that is running up from the basement will have to wait for Tim.
But Skylar can remove the carpet.
Carpet removed!
Now she needs to scrape the popcorn ceiling off.
Check out the insulation job. Plenty of insulation just crammed in with plenty of gaps for cold air.
The sheet rock was glued down. So Skylar is using an oscillating tool to scrape it off.
Skylar got the insulation removed.
She cut a piece of foam board and spray foamed around it.
Sealing off any gaps.
Then Skylar put the insulation back in after cutting it to the right size.
This part putting sheet rock in and mudding and taping happened so fast.
Tim sanding!
Skylar sanding!
Tim getting a coat of primer on the walls and ceiling.
Almost done with the primer.
Now that is some white walls. It sure looks different. Months of looking at studs, insulation and then sheetrock.
AFTER
Now this looks better.
BEFORE
Not a very good mudding job.
Skylar was at work when Tim put the primer on the walls.
She was so happy to see walls ready for the real painting. Next is to paint it the colors of her choosing.
Tim and Skylar started the painting.
The ceiling and three of the walls will be this color.
The wall in front of them will be the accent color.
Tim and Skylar put two coats of paint on the walls.
We got the flooring.
Wow this looks blue.
It's really not the true color.
Got the accent wall painted.
It's grey and turquoise.
Tim is putting a sub-floor in. This way from the hallway to the bedroom the floor will be level.
Coffee break.
Got the sub-floor in. Now Tim and Skylar are working on her outlets and light switches.
One outlet is done.
Tim is working on the box for her light and fan.
Skylar is putting her light and fan together.
Mark that one off of the list.
Light switch is in.
The list is getting smaller.
Fan is in and works!
Now the flooring.
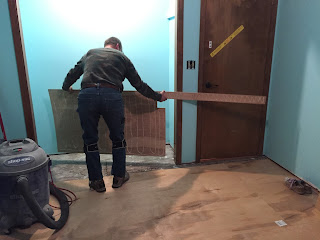
This matting goes in first then the hardwood floor planks.
It's looking good. Can't wait until this project is done. Neither can Skylar. She can finally unpack.
Tim did a awesome job laying it all out and cutting it.
Tim got the floor layed. Now getting the trim back up on the door. Closet door trim is in.
Still need to put in the trim piece between the two floors.
Today is the day! All the trim pieces are in, nothing left to do but start moving her back in. She is working on getting her bed moved in. She will no longer be living under the stairs and using the basement address.
The final thing to do is get her closet put together. We picked this up at Menards.
We figured out the design and Tim started putting it up.
The clothes are in.
Now all Skylar needs to do is get her bedding on and she can sleep here tonight and the next and the next.
It's done!!!


No comments:
Post a Comment